The Stackchat Web Messenger is distributed using NPM.
Installation
The installation process can be applied to any web page on which you wish to host the messenger. You will likely want to install it on a development environment first to perform any customizations and testing before introducing it into your production environment.
There are two methods available to deploy the bot. We recommend installing it through NPM, as that will provide you with complete control over the version of the Messenger that is deployed and introduce newer versions when your organization is comfortable with the changes. IF npm is unavailable to you and you require an embed script for integration the following script can be used to add the stackchat web-messenger client into an existing web-page.
Through Script Tag
The script tag method is quick and easy.
Add the following code towards the end of the head section on your page.
The script will be loaded asynchronously, so you don't need to worry about this blocking the loading of your app.
<script>
    !function(e,t,n,r){function s(){try{var e;if((e="string"==typeof this.response?JSON.parse(this.response):this.response).url){var n=t.getElementsByTagName("script")[0],r=t.createElement("script");r.async=!0,r.src=e.url,n.parentNode.insertBefore(r,n)}}catch(e){}}var o,p,a,c=[],i=[];e[n]={init:function(){o=arguments;var e={then:function(t){return i.push({type:"t",next:t}),e},catch:function(t){return i.push({type:"c",next:t}),e}};return e},on:function(){c.push(arguments)},render:function(){p=arguments},destroy:function(){a=arguments}},e.__onWebMessengerHostReady__=function(t){if(delete e.__onWebMessengerHostReady__,e[n]=t,o)for(var r=t.init.apply(t,o),s=0;s<i.length;s++){var u=i[s];r="t"===u.type?r.then(u.next):r.catch(u.next)}p&&t.render.apply(t,p),a&&t.destroy.apply(t,a);for(s=0;s<c.length;s++)t.on.apply(t,c[s])};var u=new XMLHttpRequest;u.addEventListener("load",s),u.open("GET","https://assets.au.stackchat.com/sdk/web-messenger/2.1.25/loader.json",!0),u.responseType="json",u.send()}(window,document,"stackchat");
</script>
Browserify and Webpack via NPM
First, install it from NPM.
npm install --save @stackchat/web-messenger
Then import the module, inserting your app-id where appropriate.
import Stackchat from "@stackchat/web-messenger";

Stackchat.init({appId: '<app-id>'}).then(function() {`
`    // Your code after init is complete`
`});
Then initialize the Web Messenger by placing this snippet towards the end of the body section of your page, replacing the <app-id> with the app ID from your desired bot.
<script>
    stackchat.init({appId: '<app-id>'}).then(function() {
        // Your code after init is complete
    });
</script>
Updating the Web Messenger
If using the NPM method, you will need to manually update the Messenger when you're prepared to start using it. This can be done via NPM command:
npm update @stackchat/web-messenger
If using the script tag method, you will always be using the most recent version.
Finding your App ID
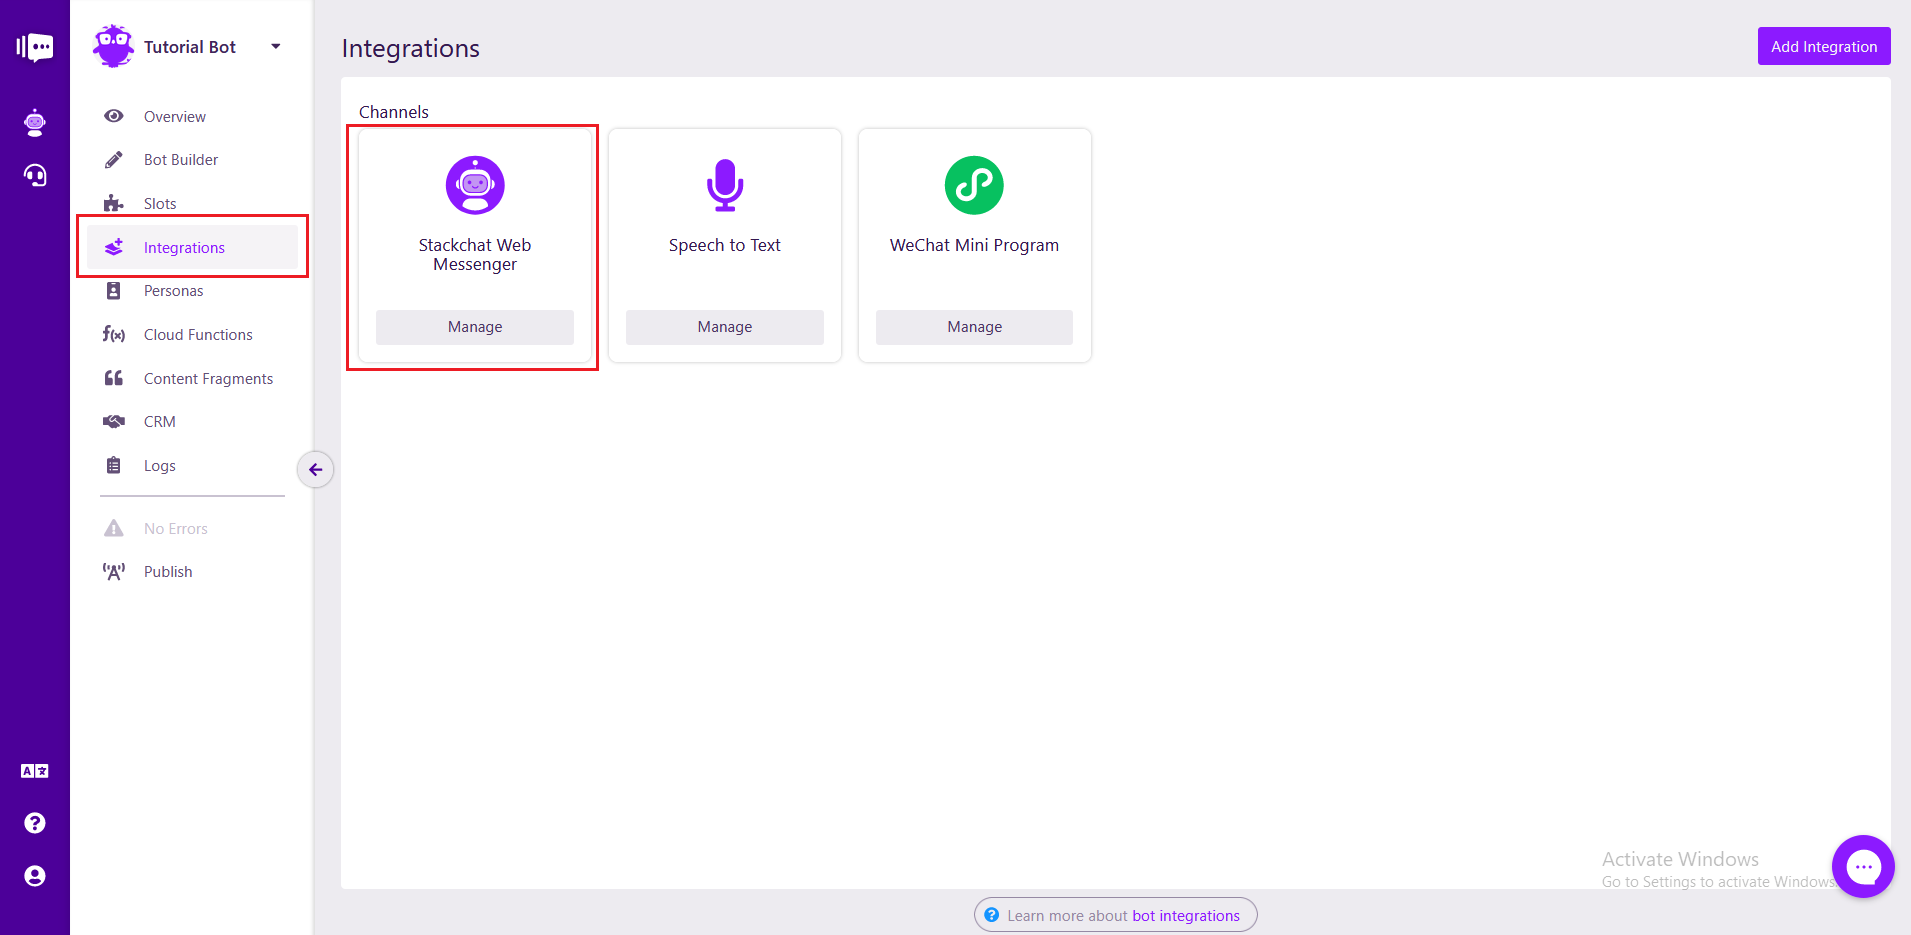
As part of that installation, you will need your Stackchat App ID that indentifies each individual bot. This can be found in the Integrations section of your bot.
To locate your App ID, click Integrations. If you have already published your bot, you will see the Web Messenger channel integration.

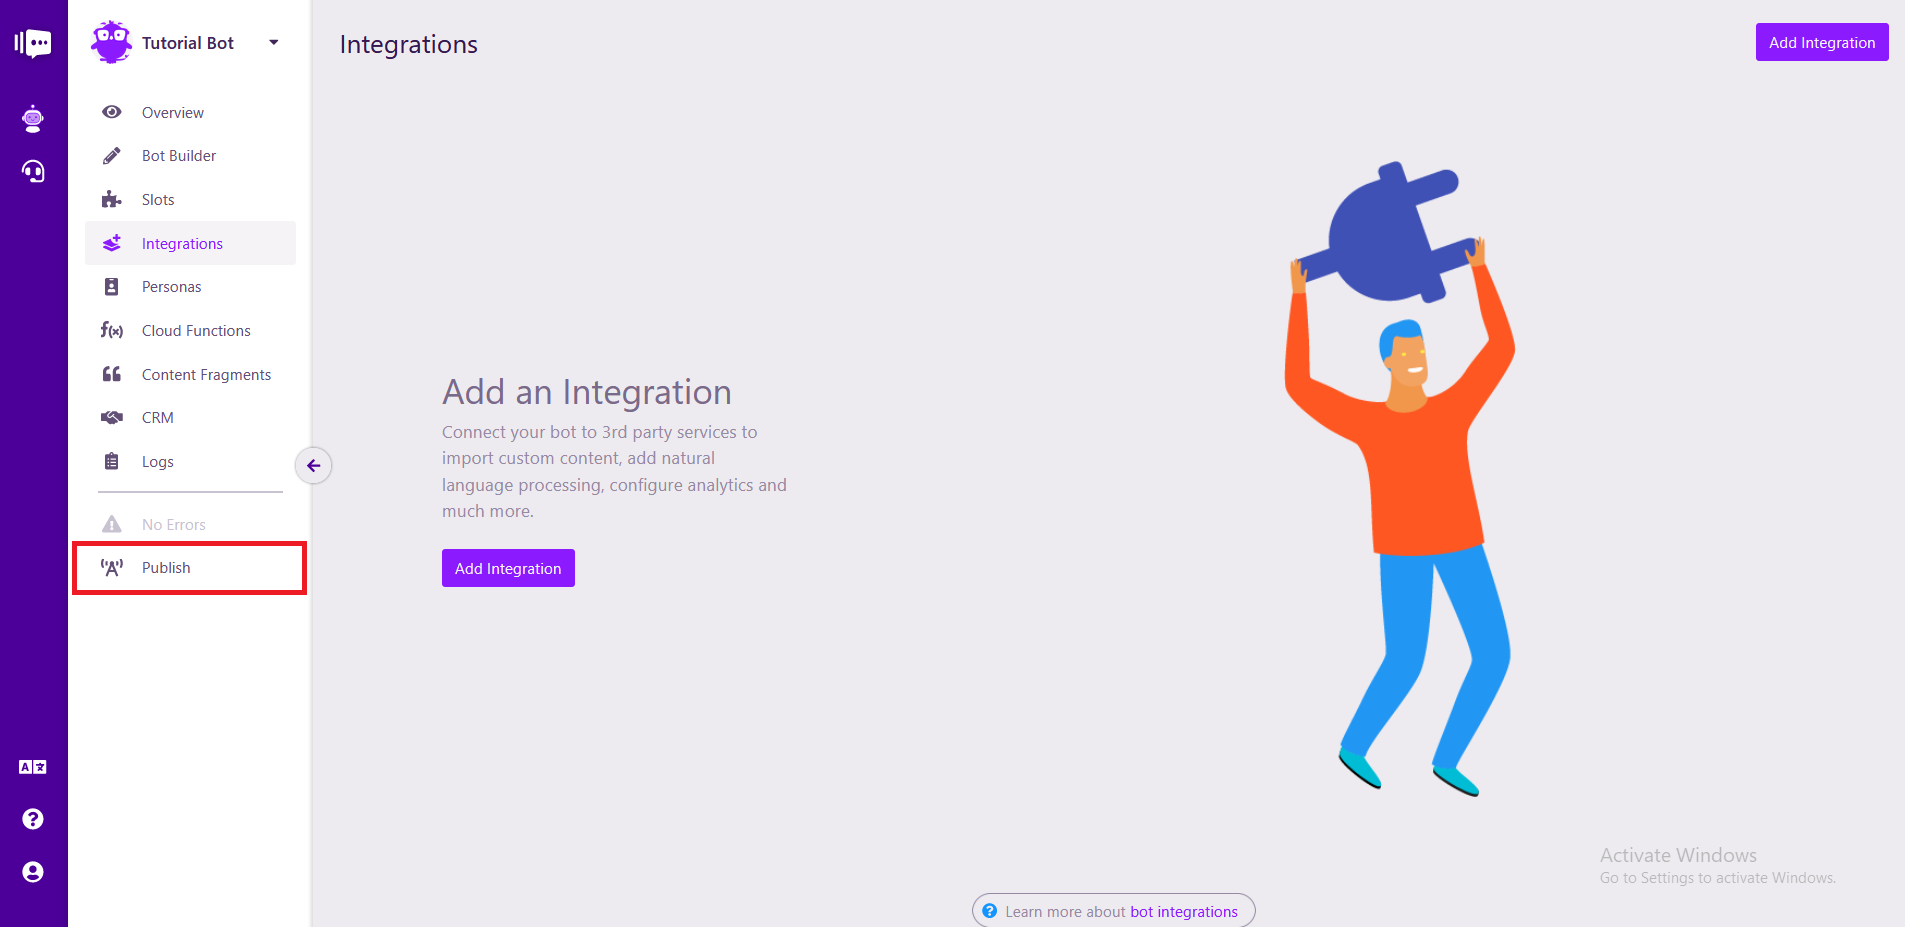
If you have not already published your bot you won't be able to view the integrations page, if there are no errors preventing you from doing so, go ahead and publish your bot.

Publishing the bot is necessary before anything will show in the deployed Web Messenger.
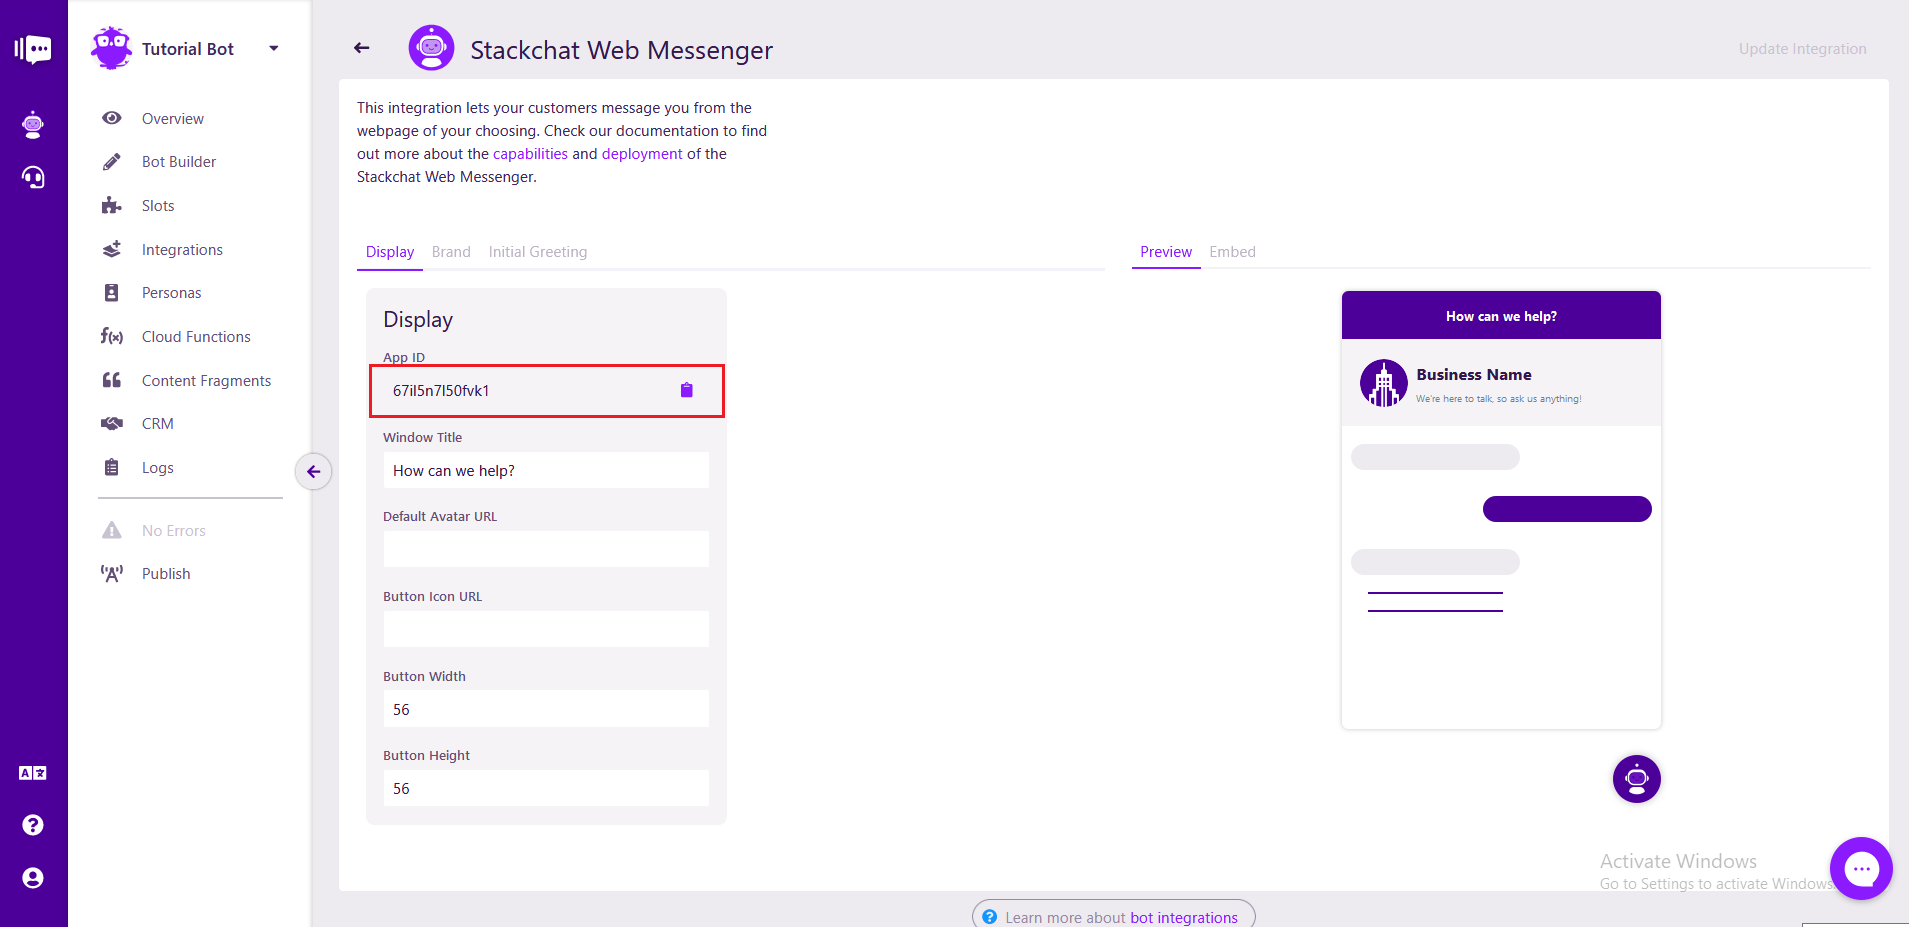
Click the 'Mangage' button for the Web Messsenger Integration to go it's management screen, here you can configure a number of properties related to your bot and also find your bots application id (app-id).

With your application id you can now deploy the web-messenger client anywhere.