Create and Publish Your First Bot
What is this guide for?
This guide is for users that would like to know how to create a bot, populate it with content and publish it using the Stackchat Studio web-app.
The guide only covers a narrow spectrum of the features available to users that use the app and should be used in conjunction with our more detailed docs for improved clarity when users wish to know more about the actions described within. This guide is the first in a series that detail the Stackchat Studio bot-builder and how to use it to create rich and engaging conversational experiecnces for users.
Let's begin!
Step 1: Create a Bot
Open up the bots management page by using the available quicklink from the quicklinks panel at the top right of your Studio landing page. After navigating to the bots management you will be presented with a list of all the bots that are part of your organisation. Organisations that have not yet created any bots will see the following screen.
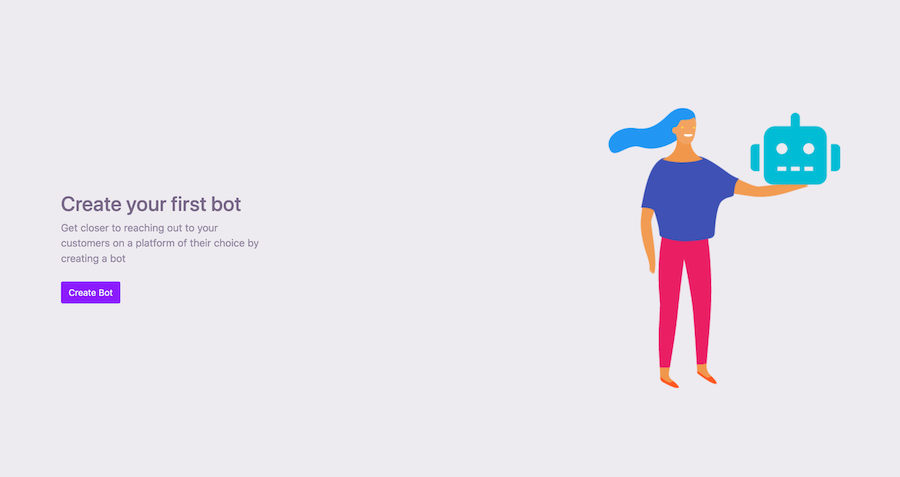
If your organisation already contains some existing bots, go ahead and ignore these for the moment, the purpose of this guide is to create a new bot from scratch. Click the 'Create Bot' button located either at the top right of the screen, or in the middle of the page if your organisation has no existing bots. This will open up a new panel with a form where you can name your new bot (required) and choose a starting template to prepopulate you bot with.
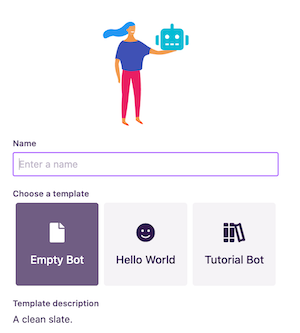
Give your bot a name of your choosing byt filling in the name field. There are several pre-populated templates to choose from when you create a bot but for the purposes of this guide we're going to be creating a bot from scratch so go ahead and make sure that the 'empty' template is selected and click create.
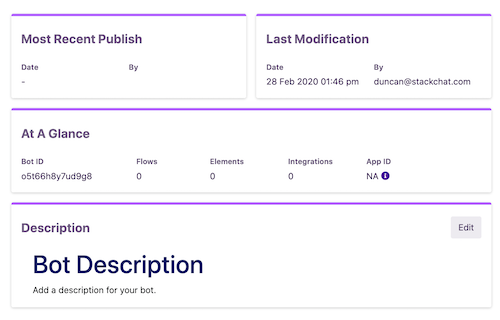
Once your bot has finished being created, you will be directed to the landing page of your new bot we refer to this as the bot dashboard page.
Step 2: Adding a Flow
The dashboard page you arrive on is an overview of some of the important operational and diagnostic information related to your your bot, right now it's unpopulated because you haven't given your bot any content to display, nor has it ever been published to an audience for them to interact with.
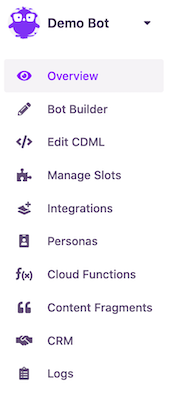
On the left side of you screen you will see the sidebar menu which contains links various service and management pages for your bot. The only service you need to worry about right now is the 'bot-builder' where you can edit the actual conversational elements of your bot, so go ahead and navigate into the 'bot-builder' by clicking on the navigation button contained inside the sidebar menu on the left hand side of the screen.
Once you arrive inside of the 'bot-builder' you will notice a few things immediately.
- An empty grid (to be populated shortly).
- A toggle button for changing the view type (not covered in this guide)
- A 'Create Flow' button which we discuss in further detail below.
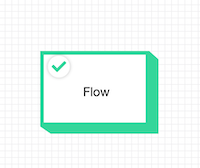
The grid you can see on this page is where you can see the individual nodes/elements of your conversation. You can zoom in and out as well as click into these nodes to get a more granular view of them and their relationships. The nodes/elements are the building blocks of your converstaion content and the first such block we're going to create here is the 'flow'. A flow can be seen as a container that groups related parts of a conversation together. Add a flow by clicking the 'Create Flow' button in the top right hand corner of your screen.
Notice the new block that now appears in your grid?
By default all new flows are created with a name of 'Flow', we're going to use this flow to create an introduction that our bot will use to greet new users.
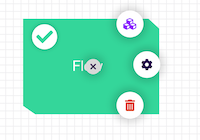
Click on the new 'Flow' node that has just rendered into the grid, you'll notice a few buttons appear over the top of node you just clicked. Select the settings cog (middle button) to open up the management panel for this flow.
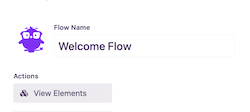
Click into the name field, we're going to rename this flow to "Welcome Flow", to represent that the elements inside of this flow are related to how the bot greets new users. It's important that you have unique names for flows as your bot relies on them being unique to help it know where to look for it's conversation elements, you'll be presented with an error if you try to use duplicate flow names, if you'd like to know more about flows you can visit our detailed documentation on it here. After you're done renaming the flow, click on the 'View Elements' button inside of the same panel to navigate to the elements management view for this flow.
Step 3: Creating an Element
Having just navigated into the elements management view you'll notice in the top left corner of your page that the name you previously gave this flow (Welcome Flow) is apparent. This means you're currently editing the content beloning to that flow.
We mentioned before that 'flows' can be seen as containers for grouping related content. Well the content blocks that are contained inside of these 'flows' are referred to as 'elements' of which there are many, but for now we are going to just going to look at one for the sake of this guide.
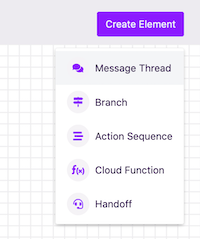
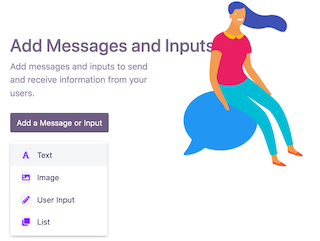
Go ahead and click on the 'Create Element' button at the top right of your page and select the 'Message Thread' item to create our first conversation 'element'.

Like we saw when we created the first 'flow', you will have noticed a new node pop up into the grid on your page. That's the 'message thread' element you just created.
As you did before with the 'flow' element you created, click on the new message thread node that has appeared in the graph and select the settings cog to open up the editing panel for the 'message thread', alternatively you can double click the node to open up the panel.
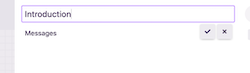
Rename your new 'message thread' to "Introduction" at the top right by clicking on the title.
Step 4: Populate Message Thread
Message thread elements allow you create actual content that will be sent to the user and displayed inside of their chat window. Not only can they be used to send messages to users, a 'message thread' can be used to capture input from a user and stored as a variable (referred to as 'slots') that can be later processed or referenced again in the conversation. For now we are going to simply focus on creating some content, but if you would like to know more about message threads you can view our detailed docs for more information.
Let's add a friendly greeting message to our 'Introduction' message thread that our bot will greet users with when they begin a new conversation. Click the 'Add a Message or Input' button and add a 'Text' element to your Introduction message thread.
You'll notice the new Text message node that has popped into existence inside of the message thread inside of the panel, the red box surrounding the input shows you that this field is mandatory! Click into the red text field and add a greeting.
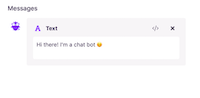
Leave the editing view for your new message thread element by clicking anywhere inside of the gray box, modals are automatically dismissed when you do this. And the text that you added will be saved.
Now that you've got some content into your bot, you're ready to publish!
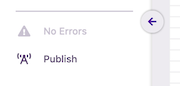
Looking back at the side bar on the left hand side of the page, you'll notice that the previously grayed out 'Publish' button is available and that there are no errors preventing you from publishing this bot. It's important to note that we do our best to ensure that the bots you have created contain no errors and prevent you from publishing bots if they do, check out our docs on publishing to learn more.
Go ahead and click the publish button.
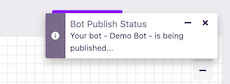
Publishing a bot kicks off the process of deploying all of the latest changes to your bot into the cloud, making further edits will not result in demo-able changes until those additional changes themselves have been deployed again. Publishiing a bot is akin to release a new version of it.
The Studio will monitor the status of your latest publish request and display notifications to keep you informed as it progresses and when there is any additional information available such as when the publish completes.
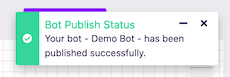
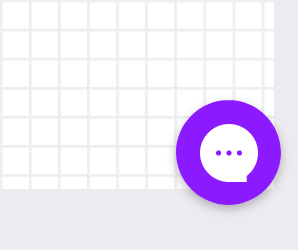
Once you see the publish successful message, you will notice the chat messenger bubble appear in the bottom right hand corner of your screen. That messenger bubble is where you can demo your bot, as you publish changes to your bot you can test your conversation experience immediately inside the window
Open up the bubble, and send your bot a new message! Your bot will reply to you with the greeting message you created earlier.
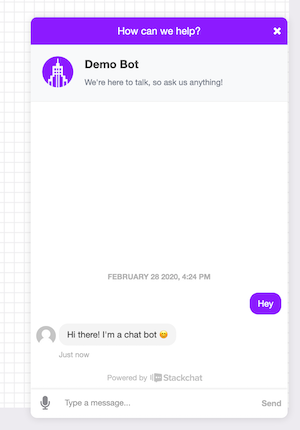
And that's it, you've successfully created a bot from scratch, added some content, deployed and finally tested the conversation you created. We've only just begun to scratch the surface, and right now the bot is a little bit light on content, it's time to start creating more content for your bot, in the next guide we are going to take a look at 'navigation elements' and how you can get your bot to move a user from one conversational element or flow to another.