Adding Navigation to Your Bot
This is the second guide in a series of getting started tutorials.
Previous: Creating and Publishing Your First Bot
Next: Collecting input from users
Who is this guide for?
This is the second guide in a series of 'how-to' tutorials that introduces new users to the Stackchat Web Studio 'bot-builder' suite. Where users can build and manage the content of their chatbot's conversation.
The guide starts off from where we ended previously.
This guide is intended for users that already have an existing bot and understand the basic concepts of 'flows' and 'elements and how to navigate using the Studio interface to get to the content that they are wanting to edit.
In this guide we will be looking at bot navigation and specifically how to navigate a user from one 'flow' or 'element' to another.
These guides only cover a narrow spectrum of the features available to users that use the app and should be used in conjunction with our more detailed docs for improved clarity when users wish to know more about the actions described within.
Let's begin!
What is Navigation
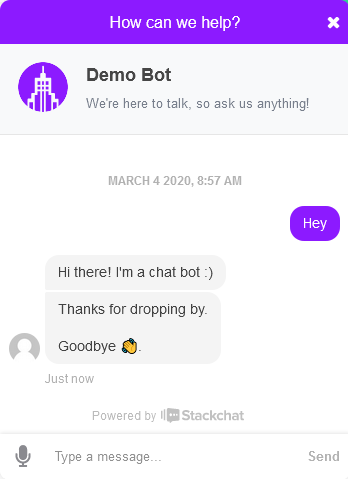
Previously we had you create a bot that was capable of sending a single greeting message to new users. We published the bot and saw that we could test it using the Stackchat 'web-messenger' widget in the bottom right hand corner of our screen.
A bot that sends only a single reply to it's users is not particularly useful, we want our bot to be able to answer multiple queries and reiterate information when asked by users.
In order to do this, the bot needs to know how to make it's way to other 'flows' and 'elements' in the conversation. We call 'Navigation'. It's the bots ability to load different convesationl blocks when certain conditions or parts of the conversation have been reached.
There are many different ways for conversation designers to signal to the bot that it is time to navigate to another part of the conversation tree, and we're going to take a look at the most common ways of doing this. But before we go any further a quick note on 'entry points'.
Entry Point Navigation
We introduced to you in the previous guide to the concept of 'flows' which are essentially containers that hold together groups of related conversational elements. We also introduced you to the concept of 'elements', which always live inside of a flow and contain the individual conversational pieces that make up the bots content and behaviours (such as knowing where to navigate and making decisions).
Conversation Entry Point
When you create your first flow for a bot, that flow will by default be made what we call the 'entry point' of the conversation.
There can only be a single 'entry point' to a conversation and it is where new users will begin their conversational journey with your bot when they message it for the first time. Without an entry point the bot doesn't know where the conversation should begin, it's up to you to choose the appropriate location for where it should start. We usually like to have a "Welcome" or "Introduction" flow that we create for the purposes of greeting new users when we design our bots.
Flow Entry Point
Like the conversation 'entry point', flows must also have an 'entry point', which is simply one of the elements inside of that 'flow' which is up to you to choose. When you create your first 'element' inside of a 'flow' it will be automatically set as the 'entry point' for that 'flow'. Remember this, there is no limit to how many elements that can go into a 'flow'. By setting the entry point of a 'flow' you are telling the bot that if it is navigation event occurs that directs the bot the parent 'flow' of a group of elements without being told explicitly which 'element' inside to use, it will use the 'entry point' element to begin delivering content to a user.
Step 1: Navigating to an Exit Flow
Now that we have that out of the way let's get back to building things.
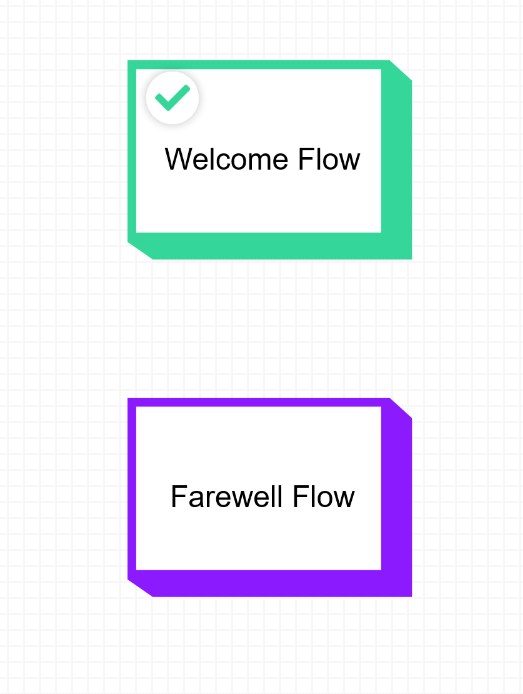
Go to the 'bot-builder' suite that we showed you in the previous guide and create a new flow, go ahead and rename it to "Farewell Flow". As before adding a new flow creates a new node in the conversation tree.
 ;
;
You'll notice immediately that the appearance of this new flow is different from the already existing "Introduction Flow". Flows and elements that are highlighted green with a tick icon inside of them are the entry points.
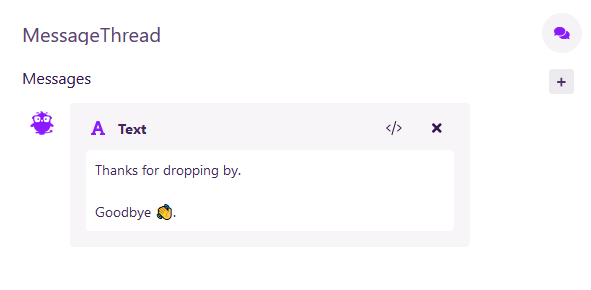
Double click into your new flow, and add a new message thread with a single message saying farewell to the user, if you like you can also rename this message thread to "Farewell".
Great, we now have an introduction for our bot and we have a farewell message, but right now the bot doesn't know how to get from the introduction to the farewell flow.
Go back to your "Introduction Flow", you can do this by clicking the back arrow at the top left hand side of the screen or clicking the 'bot-builder' link in the sidebar which will always take you back to the main view of your entire bot. Once inside your the introduction flow, open up the "Introduction" message thread we had you previously create.
If you look at the bottom of the editing panel you'll notice a division and inside the lower part of this there are some navigation options available to this element.
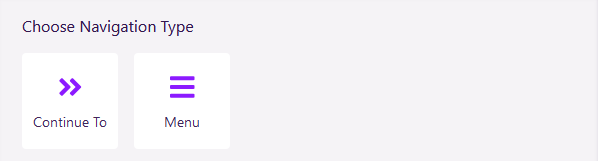
Go ahead and choose the 'Continue To' option. You'll see a popup menu appear which allows you to choose from a list the flows and elements you have created thus far. Go ahead and select the "Farewell Flow" as your "Continue To" target.
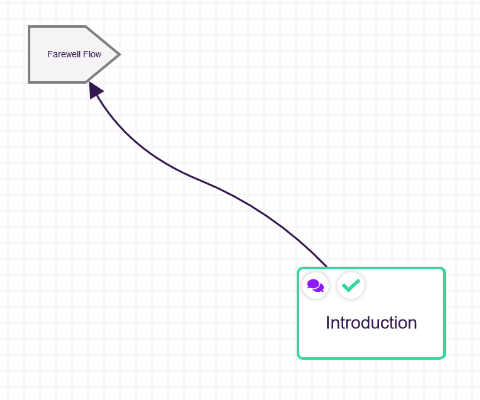
Go ahead and publish your bot again. Once it's finished publishing, send your bot a message. You'll see that after the bot has sent your greeting message it will then navigate to the farewell flow and send them your farewell message.
Step 2: Looping Conversations (Restart)
It should be obvious that the "Continue To" navigation type is useful for automatic navigation events inside of your bot, by automatic we mean the user has no control over where the bot will jump to in it's conversation tree.
What we want to add next is the ability for the user to decide where the bot should take them next. To do let's go back to our "Welcome Flow" and open up the "Introduction" message thread again.
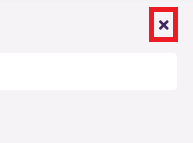
Delete the navigate to target that we previously added by clicking the cross in the top right hand corner of the navigation section.
This time go ahead and select 'Menu' instead of 'Continue To'.
The menu has several customisation options available to you to help guide users through the different possible conversation pathways in your bot.
For now we are going create two new options in this menu that allow a user to either navigate back to the beginning of the conversation or navigate to the farewell message we created previously.
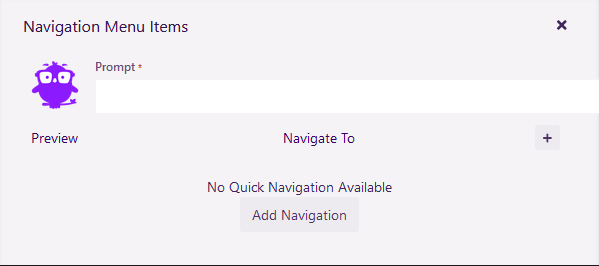
Let's start by adding a prompt to let the users know what our intent is. Click into the prompt field and add a message that will be displayed before the menu is rendered, the prompt is a required field, this is denoted by the little red astrix you can see next to the field label.
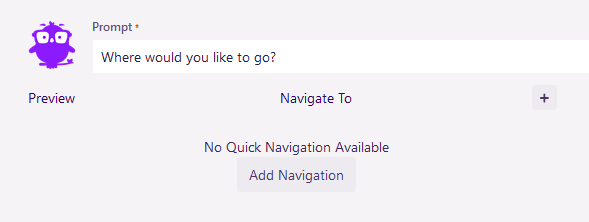
Next click the 'Add Navigation' button to add a new 'quick navigation' to the menu list. Quick navigations or 'quick navs' for short will be rendered as menu items inside of your conversation. To see more about 'quick-navs' check out their documentation.
Use the little plus button at the top right of the quick nav table to add another empty quick nav.
The preview column shows you what your nav will look as it is rendered into the conversation screen. Click the 'Add Message' text to customise the first 'quick nav' you added.
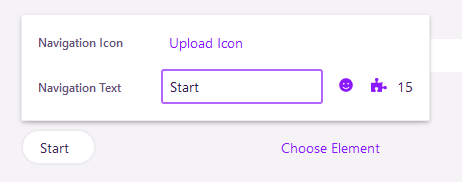
Since our quick navs are going ot either navigate us to the start or end of a conversation those two words seem like appropriate text messages to add as 'Navigation Text' of our quick navs.
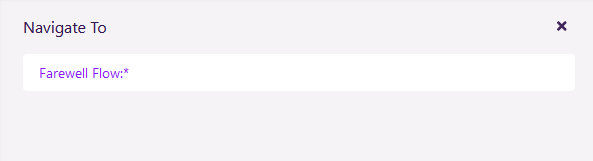
Finally, inside of the 'Navigate To' column, point the "Start" quick nav to the "Welcome Flow" and the "End" quick nav to the "Farewell Flow".
Publish your bot and send it a message.
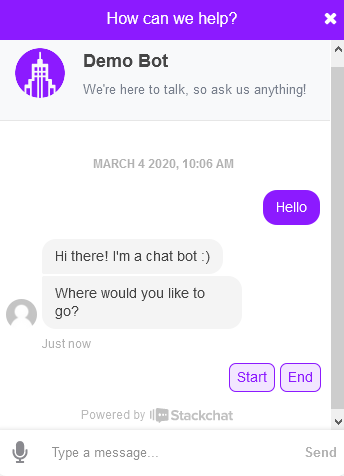
You'll see your new menu appear in your conversation!
Click the "Start" button and notice how the conversation goes back to the beginning and brings you back to the menu again. You've just created your first loop. Nearly every conversation you have will involve loops like this one, it allows users to revisit content they may already seen and a conversation to continue forever instead of just coming to a dead end like we had with our first bot.
Warning about Navigations.
It is possible to create infinite automatic loops with your bot, while we do our best to prevent this from happening and warn you when possible, you are responsible for how your bot behaves, if you do accidentally create one of these, you will have to wait until the bot expires before it will stop sending you messages.
Summary
In this guide we learned about:
- 'Entry point' Navigataion
- 'Continue To' navigation
- 'Quick Navigation' Menus
In our next guide we will cover how to collect input from users and save it to be used at a later date in our conversation.